Field Setup Diagram
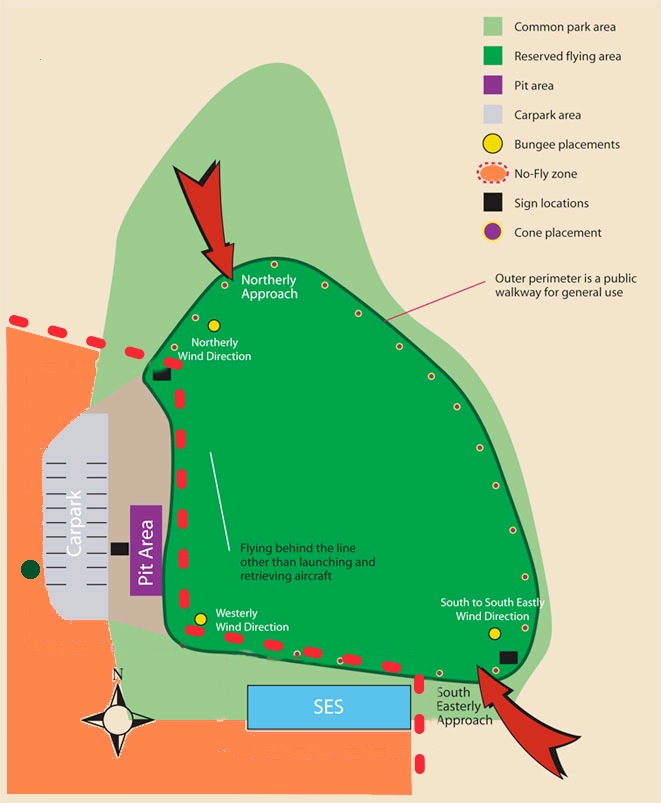
All members should make themselves familiar with these field setup instructions, particularly in relation to prohibited areas and ‘No-Fly’ zones. For safety reasons, flying is not permitted until the field has been setup. This field layout is part of our Code of Conduct. It shows no-fly zones (outlined by dotted red lines) and is a guide for members laying out the field on flying days. The locations of cone perimeter markers, ‘Field in use’ signs and the windsock etc are all indicated in the diagram.
There is also a bungee for launching gliders and a catapult for launching models which lack an undercarriage and can’t be hand-launched. Instructions on their locations and usage are available from any senior member.
Please note: The no fly zones for our field (outlined by dotted red lines above) must be adhered to at all times. .